VOLUME 15 ISSUE 1
WHAT’S HAPPENING AT MISSOURI S&T (FORMERLY UMR):
60TH ANNIVERSARY
The Coatings Institute is celebrating 60 years of service to the coatings industry!
SHORT COURSE DATES
We will be offering "Introduction to Paint Formulation" May 20-24 (Spring 2019). This course is intended to give the person a fundamental knowledge of how to approach a starting formulation and troubleshoot it. This course involves both lecture and laboratory work.
We are also offering a new course, "Coatings Composition and Properties for Sales and Marketing Personnel" March 25-27 (Spring 2019). This course is designed for those in the industry who buy and/or sell raw materials into the coatings market, as well as those who buy or sell coatings or simply use coatings. The course is intended to help the newer person in the field gain a better understanding of the science behind paint. For more information, including course times and fees, click the course name above.
For more information see our web site at http://coatings.mst.edu and to register contact us at mstformulation@mst.edu or call 573-341-4419. **These courses are held on the Rolla Campus**
ONLINE SHORT COURSE
We are offering "Introduction to the Coating Systems" online short course. This course is targeted for automotive and aviation type OEM companies. This self-paced seminar will cover the painting system from the composition of paints to the evaluation of the dry film. The pigments, resin, solvents and additives will be discussed including their influence on the coatings performance. Color measurement, surface profile, and other evaluation criteria will be related to composition. The importance of surface preparation and other manufacturing criteria will show the system complexity and each step's importance.
We are offering "Surface Defects: Elimination from Human and Process Contaminants" online short course. This course addresses many of the issues in prevention and minimization of defects. The course covers the defects caused by the coatings process, as well as human issues, including personal care product causes. Several of the surface defects are discussed – from basic principles and real world automotive and aircraft examples. The highly practical approach of this course will greatly aid the personnel involved in the painting operation to reduce and systematically approach issues.
EMPLOYMENT TAB
There are no current job openings available. Anyone wanting to have job opening listed, please contact us at (573) 341-4419 or e-mail: mstformulation@mst.edu . You can also write to us at Missouri S&T Coatings Institute, BOM #2, 651 W. 13th St., Rolla, MO 65409-1020. Our web site is http://coatings.mst.edu
TECHNICAL INSIGHTS ON COATINGS SCIENCE
Hardness Testing in Paints
Ashish Zore, Graduate Student, Missouri University of Science and Technology
Mott [1] defines hardness as the measure of the resistance to permanent deformation or damage. This definition may seem appropriate, but it would be unreasonable to demand that permanent damage should always take place during the hardness testing. We know that rubbery substances could be easy to indent while being difficult to damage. According to the above definition, a brittle substance like rosin would be softer than a tough material like rubber. A more appropriate definition is given by Braun [2] - “Hardness is the quasistatic resistance to local non-homogenous deformation caused by point or line-shaped force centers.” This definition includes temporary as well as permanent deformation of the substance.
In practice, different testing methods are used:
1. Scratch method
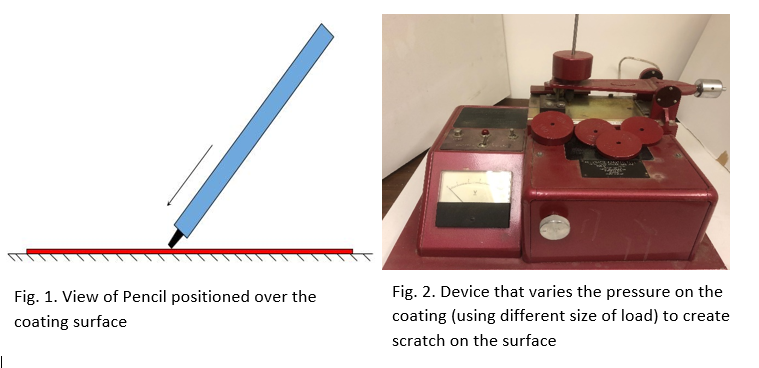
Scratch test involves drawing a loaded tool across the rest surface followed by visual observation of the effect on the substrate. The method of evaluation can be (i) the necessary force on the tool to penetrate to the substrate, (ii) the force that creates a scratch of certain dimensions or just a visible scratch without baring of the substrate and (iii) the necessary strength properties of the tool material to make possible the formation of a visible scratch (equivalent of the Moh hardness scale). The apparatus shown in Fig. 1 can be used for evaluation (i) and (ii). Here, a load of varying mass is placed on top of the scratching tool in order to exert different amount of force.
Pencil hardness is used for evaluation (iii) where pencils of different hardness values are drawn over the coating surface in order to scratch it. In this test, the hardness of the scratching tool (here, pencil tip) is varied while keeping the pressure same. The standard protocol ASTM D 3363-05 describes two end point for pencil test: Gouge hardness and Scratch hardness [3]. Any defacement of the coating film other than a cut (gouge) is considered a scratch.

Scratch test have poor reproducibility with variation of 30-40% [4]. One of the reasons for such variation is the surface conditions e.g. contamination with oil or silicones can drastically improve scratch resistance. This test method is only applicable on a smooth surface and is ideal for quick evaluation of the finished products.
2. Damping Methods
In damping methods, a suitable tool with a known content of kinetic energy impinges on the surface of the sample, deforms it and thereby loses a certain amount of its energy; the loss of energy is somehow converted to softness or hardness number. These devices are extremely simple and very suitable for practical applications. One such instrument is pendulum hardness which evaluates hardness by measuring the damping time of an oscillating pendulum. The pendulum rests with two stainless steel balls on the coating surface. During the oscillation of the pendulum, friction occurs between the coating surface and stainless-steel ball. Depending on the elasticity, the damping will be stronger or weaker. Here, number of oscillations or time elapsed, until the pendulum halts is recorded. If there are no elastic forces, the pendulum will oscillate for longer time. High elasticity will shorten the length of oscillation. These methods because of their simplicity can often lead to difficulties in interpretation as well as translation into practical terms.
3. Indentation methods
In this method the apparatus is designed to apply a load to the indentor for a certain time and measure the film deformation either under load or after unloading. Measurement under load is used for determination of hardness while unloading gives information about the viscoelastic property. Simple indentation apparatus like Buchholz indentation apparatus is suitable for coatings with plastic deformation behavior. Coatings with elastic deformation behavior cannot be evaluated by this apparatus, because after removal of the instrument an elastic coating will show no or very little indentation. The instrument consists of a double cone block, which is placed on the coating for 30 seconds. Indentation is measured as length in millimeters with the help of a precision microscope and is then calculated according to the following equation:
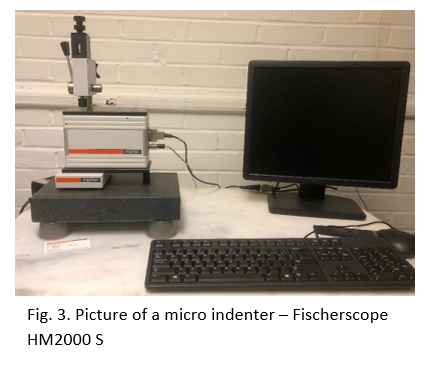
For the entire loading and unloading cycle where we get the mechanical and elastic properties, a more sophisticated instrument is required. One such instrument is a Fischerscope HM2000 S.
References:
- 1. B.W. Mott. Micro-indentation hardness testing, Butterworths, London.
- 2. A. Braun. “Hartemessung (Grundlagen, Begriffe and Methoden.” Schweiz. Arch. Angew. Wiss. Tech. 24. 106 (1958).
- 3. ASTM standard D3363 – 05 Standard Test Method for Film Hardness by Pencil Test.
- 4. Hardness testing of Organic Coatings by P. Fink-Jensen


